
Carrot Cake with Cream Cheese Frosting {Recipe}
We have a deep egress window in our house. It's about 4 feet down to the bottom of the window well. And for some reason, the occasional bunny decides to take a leap down it. Once, my husband and my father tried to free the bunny by opening the window and "grabbing it." But bunnies are fast. The thing decided instead to squirt through the small window opening, and run around the basement for a while before they caught it.
 (Stay with me... I'm getting to the cake.)
So, last week, when yet another bunny decided to check out the window well, my husband wasn't home. And my father lives two plane rides away. So, the 5-year-olds and I went to ask the neighbor if he had any ideas for rescuing the bunny, and NOT letting it escape into the basement. He insisted that he would catch the bunny- again from inside. So down to the basement we went, bucket in hand. This bunny wasn't quite as quick as the last one-- and Mr. Dick was ready for him (or her). After one near-escape, the bunny was captured, put in the bucket, carried triumphantly through the house to be set free, outside to roam once more.
 The 5-year-olds dubbed Mr. Dick "The BunnySaver." He now has superhero status in our house. So, to thank him... I made him a carrot cake. That's appropriate for a Bunny Saver, right?
The challenge is that I don't really like carrot cake (it's a texture thing). I've been asked many times for a good carrot cake recipe, but have had to say no because, until now, I've never baked one. So, I consulted the Google gods, and I looked over my favorite pumpkin cake recipe-- because I figure pumpkin cake and carrot cake should be kind of similar.
I actually like this cake. It does have a lot of texture, but I'm prepared for it. Plus, I think I've had a lot of dry, and overbaked carrot cakes. This one does not have those problems. It's very moist. I hope you'll try it, and if you do actually like carrot cakes. Let me know (honestly) how this one rates.
 What You Need:
2 1/2 cups flour
2 tsp. baking powder
1 tsp. baking soda
1/2 tsp. salt
2 tsp. cinnamon
1/2 tsp. ground ginger
1/4 tsp. nutmeg
1 cup brown sugar
1 cup (granulated) sugar
1/2 cup butter (at room temperature)
3 eggs (at room temperature)
1 Tbsp. vanilla
1/4 cup applesauce
3/4 cup buttermilk (at room temperature)
2 cups grated carrots (about 4-6 carrots)
1 (8-ounce) can crushed pineapple, drained
Optional:
1 cup flaked coconut, toasted (and divided)
1 cup chopped pecans, toasted (and divided)
For The Icing:
1 8 oz. brick of cream cheese (at room temperature)
1/2 cup butter (at room temperature)
2 tsp. vanilla
3-4 cups powdered sugar
Yield: 2-8" or 9" layers (or, like I made, 3-6" layers)
* First, let me give you the head's up that this is not a quick recipe. Plan at least 30 minutes to an hour to make the batter before you even get the cake to the oven.
 Start by toasting all of your pecans and your coconut. Spread the flaked coconut onto a rimmed baking sheet, and place into a 350-degree oven for 5-7 minutes, checking it and stirring (or shaking) it every 2-3 minutes.
When the edges start to turn golden brown, remove the pan from the oven. Gently shake the pan for about 30 seconds to finish toasting. Remove from the pan to a cutting board.
Then, toast the pecans, by spreading them on the same sheet, and baking for about 5-7 minutes at 350.
I would do the nuts and coconut separately, because while they each take about 5-7 minutes to toast, the coconut is much more delicate, so once it starts to get golden, it needs to come out immediately, or it will burn.
 Chop both the coconut and the pecans fine. You will use 1/2 cup of each in the batter, and 1/2 cup of each to cover the sides of the cake when decorating. (Chopping the coconut is kind of a silly step, but I think it helps for those of us who don't like the long strings of coconut in their baked goods. And it will help the decorative side sprinkling look better.)
 With the small side of a box grater, or using a microplane grater, grate your carrots. (They should be peeled and washed first, of course.) You need 2 cups of grated carrots-- that's about 4-6 carrots.
 In a large measuring cup or bowl, add the buttermilk, applesauce and drained pineapple to the carrots. Set aside.
 In a medium-sized bowl, whisk together the flour, spices, salt, baking powder and baking soda. Set aside.
 In a mixing bowl, cream together the butter, sugar and brown sugar until it is light and fluffy. (At least 2-3 minutes!)
Add eggs, one at a time, mixing well with each addition, and scraping down the bowl in between.
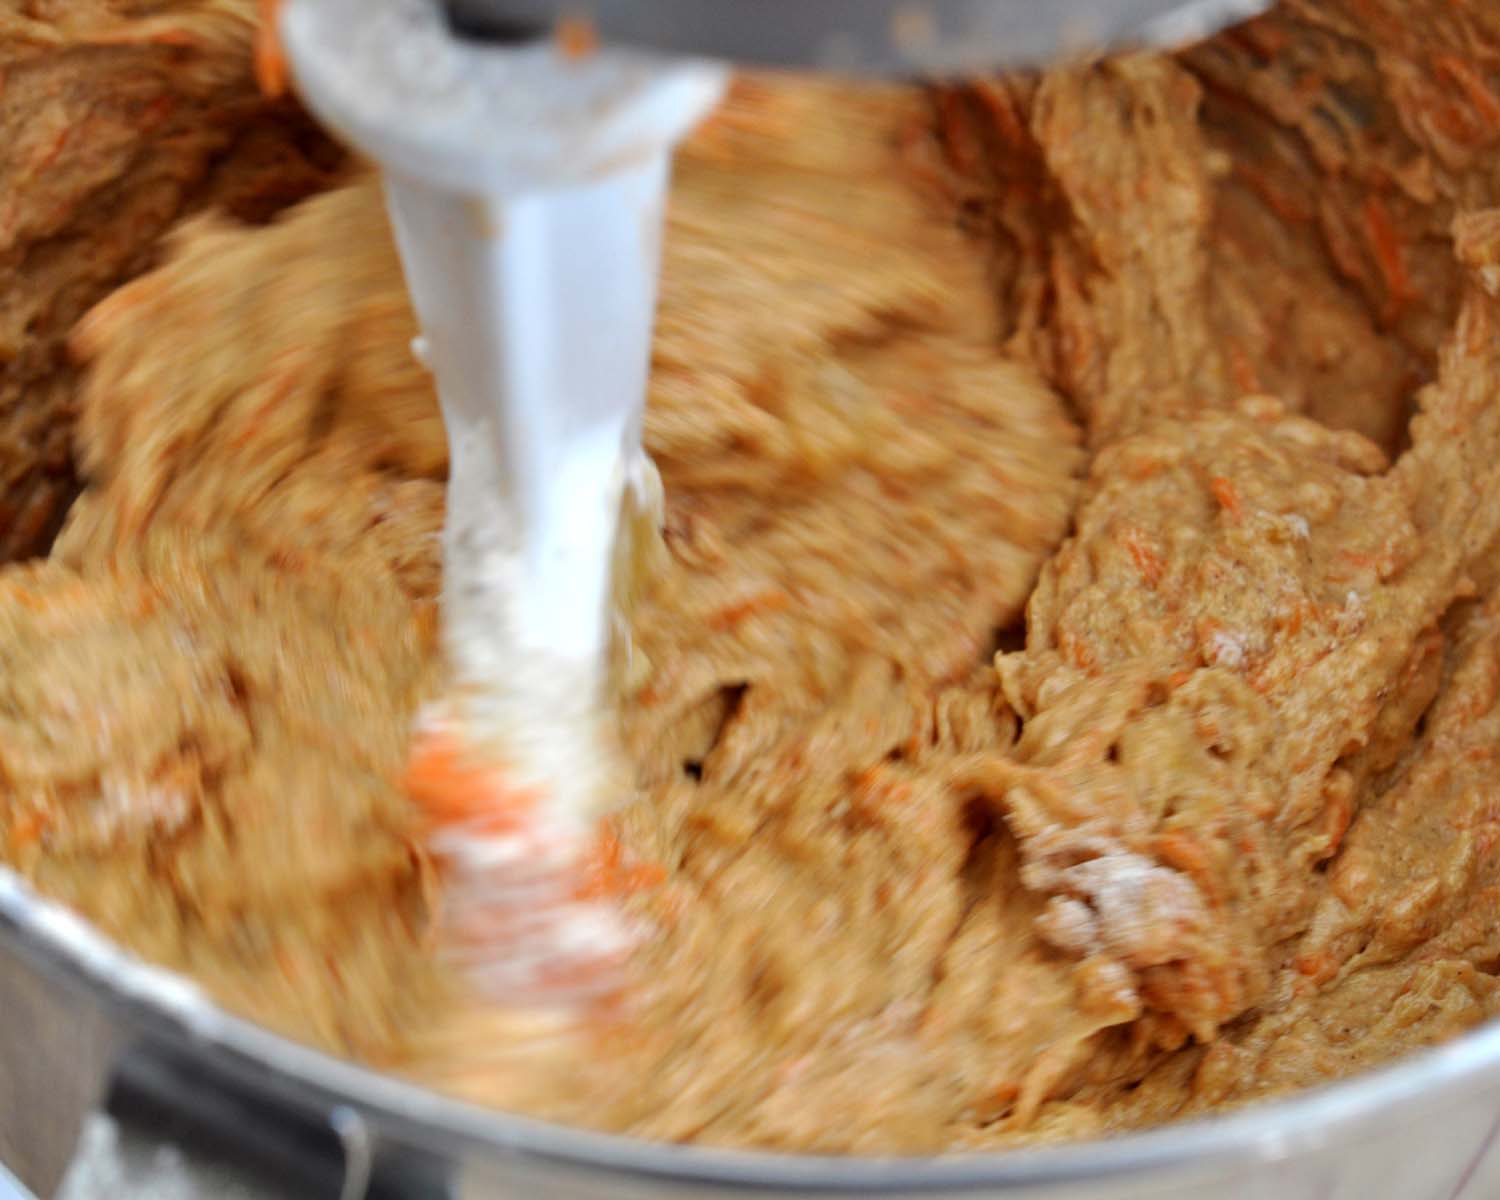
 Starting with the flour, alternate adding the flour mixture with the carrot mixture. (flour- carrots- flour- carrots) Mixing well with each addition.
 Lastly, add 1/2 cup each of chopped, toasted coconut and pecans. Mix well.
 Prepare your cake pans: Line the bottom with parchment paper cut to fit. Grease the sides. I use Cake Release
 , or just dip a paper towel in shortening, and rub it along the sides.
*Note: I recommend using Bake Even Strips when you bake. I didn't this time because I thought the cake would be dense enough that it wouldn't dome much. I was wrong. I should know better. Click the link to see my post on Bake Even Strips, see what they do, and how you use them.
 Divide batter among prepared cake pans. (I put 1 3/4 cup into each 6" round pan.)
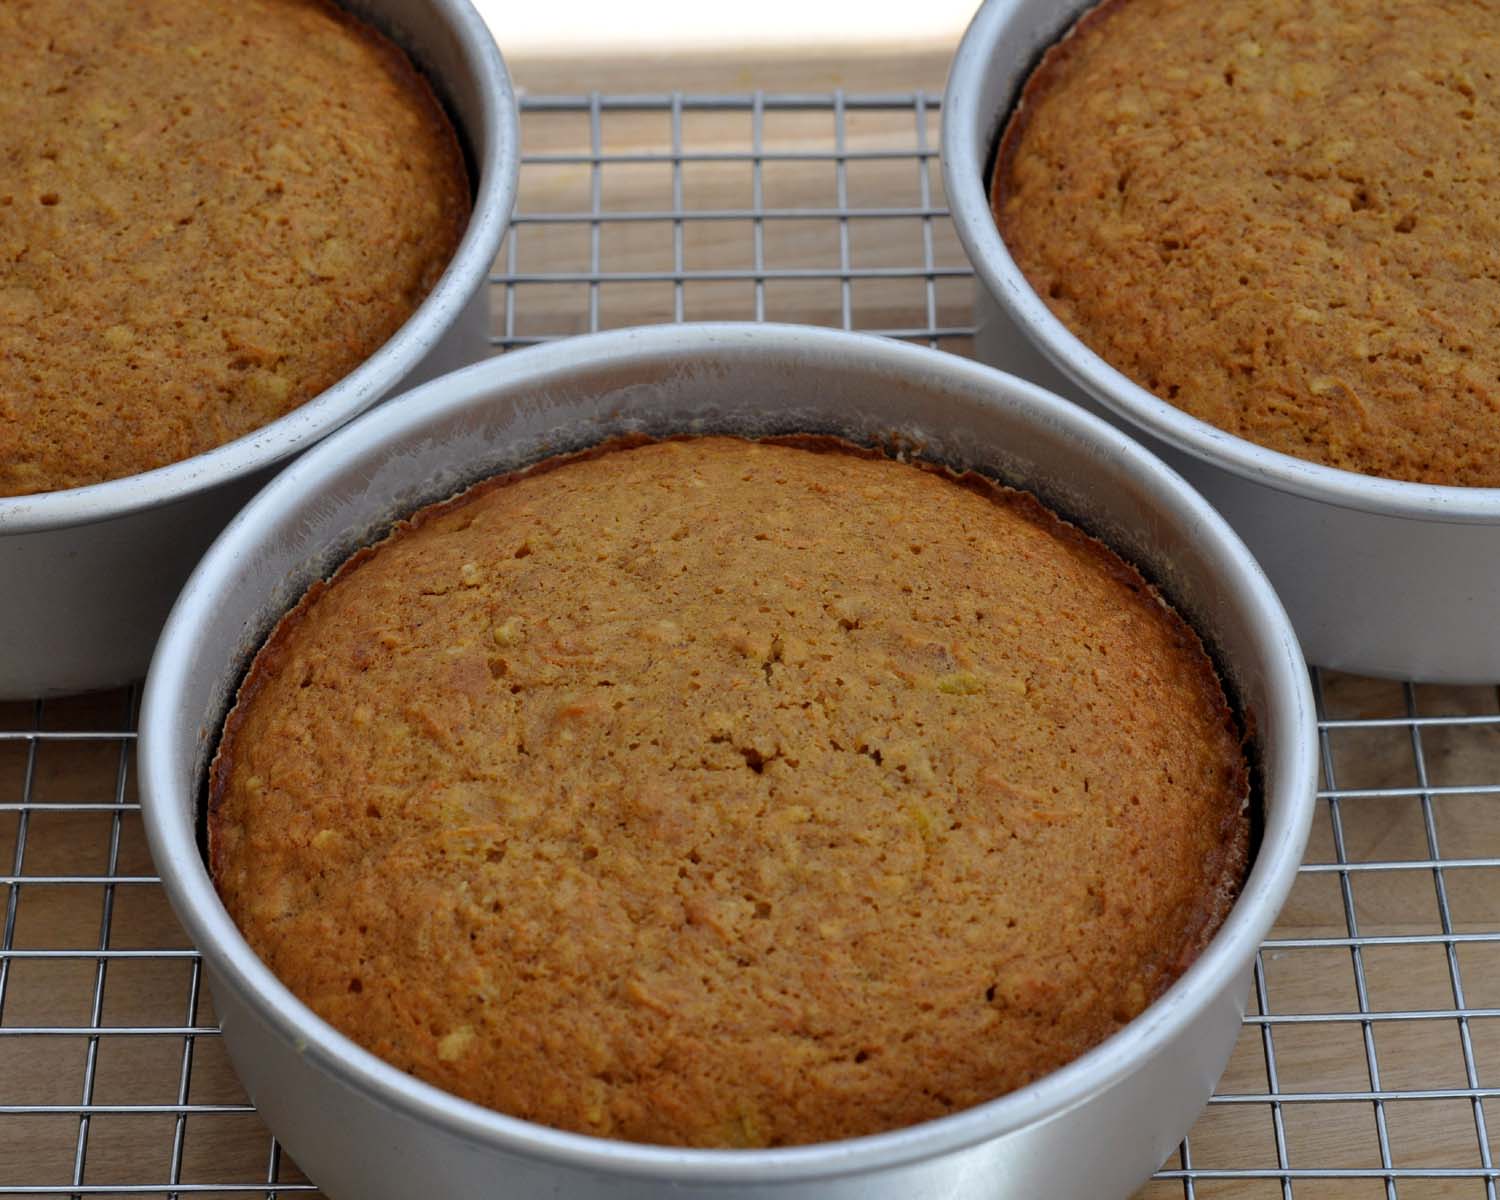
Bake in a 350-degree oven. I baked the 6" cakes for 25-30 minutes. I would expect 8" cakes to take about the same, and I'd check 9" cakes around 20 minutes.
 When a toothpick comes out clean, remove the cake pans to a cooling grid.
 After 10 minutes, remove the cakes from the pans, and allow to cool. (If you let the cake cool in the pan, that is when it sticks.)
While the cakes cool, you can make your icing.
Cream together the cream cheese and butter in a mixing bowl. Add the vanilla, mix well. Add the powdered sugar about 1 cup at a time, until it reaches the desired thickness. (If it gets a little too thick add a tsp. or so of milk to thin it down.)
I don't know how it's possible that I have zero photos on this entire site of making cream cheese icing, but somehow, I do not.
Decorating The Cake:
 When the cakes are cool, level them, and torte them, cut them in half - or thirds - to add layers. Because there are so many pieces of coconut, pecan and pineapple in this cake, be aware that thin layers will not work terribly well.
 Spread a layer of cream cheese icing in between each layer.
!Remember! You always decorate cakes upside down... so the bottom is the top and the top is the bottom. If you're doing two cakes together, put the bottom layer right side up, and the top layer upside down on top of it. (Click here to see the how to ice a cake tutorial.)
 If you want to add the nuts/coconut to the sides of the cake, ice the sides first. You don't want a terribly thick layer of icing on the sides, when you coat them, because that makes it squish out when you roll it in your nuts or sprinkles... making it harder to ice the top of the cake.
You may also notice that I've got this on a piece of parchment paper to cover the sides. It was easier for me to pick up the cake (to roll the sides) when it was on the parchment paper. That way, I could get my hand underneath it, and not be completely covered with icing.
 Line the coconut/pecan mixture in the middle of a plate with a rim around it. You want a thick layer to roll the cake in so that it doesn't stick to the plate.
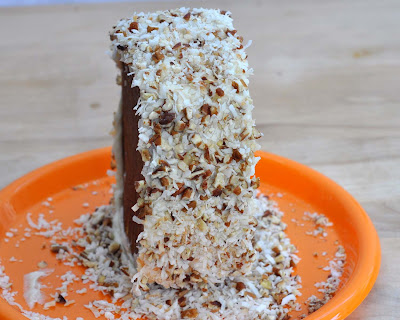 So, you pick up the cake, and gently roll or dip it in the coating.
I can't show you this in photos, because I needed both hands for the cake. So, this is the picture I could get. I highly do NOT recommend letting it go and setting it on its side as you see here. Keep your hands on it!! I consider myself very lucky that this photo- and cake- worked out.
 When you get all the way around, place your cake on the serving plate, and you have a nice layer of nuts and coconut all around the cake.
*Note: You wait to ice the top of the cake because you have to hold it by the top and bottom. If you're holding an iced cake, I don't think it would end well.
 To ice the top of the cake, be very careful not to pull all of the nuts into the frosting. You'll get a few, here and there, but if you keep your spatula facing away from the edges, you should be able to keep most out of the icing.
Click the link if you want to see my complete tutorial on How to Ice a Cake.
 To add the decorations, I colored a little of the icing orange and a little green.
I made the carrot border using a Tip #5 for the carrots and a Star Tip #14
 for the leaves.
I tried to take a photo of the technique, but it just didn't want to work for me. To make the carrots, hold the piping bag so that the back of the bag is towards your chest. Squeeze to make the fat end of the carrot, and slowly move towards yourself while you squeeze more gently.
If you've made a shell border before, the technique is similar to that. You would use the same technique with a little less pressure for the green on top.
 Store the cake in the refrigerator.
Variations:
If you want to make this cake with a little less "texture," I recommend leaving the nuts and coconut out of the batter - but still add them to the sides.
You can also substitute all applesauce for the crushed pineapple, thereby removing that bit of extra texture as well.
If you use the smaller side of the grater for the carrots, I didn't notice that they actually added much texture at all to the cake.
Click the Links Below to See:
My Pumpkin Cake Recipe
How to Ice a Cake Tutorial
What Does That Do?! Bake Even Strips
And don't forget, if you shop at Amazon.com through my link , you support this blog and its contents. Thank you!
Read More

So, last week, when yet another bunny decided to check out the window well, my husband wasn't home. And my father lives two plane rides away. So, the 5-year-olds and I went to ask the neighbor if he had any ideas for rescuing the bunny, and NOT letting it escape into the basement. He insisted that he would catch the bunny- again from inside. So down to the basement we went, bucket in hand. This bunny wasn't quite as quick as the last one-- and Mr. Dick was ready for him (or her). After one near-escape, the bunny was captured, put in the bucket, carried triumphantly through the house to be set free, outside to roam once more.

The challenge is that I don't really like carrot cake (it's a texture thing). I've been asked many times for a good carrot cake recipe, but have had to say no because, until now, I've never baked one. So, I consulted the Google gods, and I looked over my favorite pumpkin cake recipe-- because I figure pumpkin cake and carrot cake should be kind of similar.
I actually like this cake. It does have a lot of texture, but I'm prepared for it. Plus, I think I've had a lot of dry, and overbaked carrot cakes. This one does not have those problems. It's very moist. I hope you'll try it, and if you do actually like carrot cakes. Let me know (honestly) how this one rates.

2 1/2 cups flour
2 tsp. baking powder
1 tsp. baking soda
1/2 tsp. salt
2 tsp. cinnamon
1/2 tsp. ground ginger
1/4 tsp. nutmeg
1 cup brown sugar
1 cup (granulated) sugar
1/2 cup butter (at room temperature)
3 eggs (at room temperature)
1 Tbsp. vanilla
1/4 cup applesauce
3/4 cup buttermilk (at room temperature)
2 cups grated carrots (about 4-6 carrots)
1 (8-ounce) can crushed pineapple, drained
Optional:
1 cup flaked coconut, toasted (and divided)
1 cup chopped pecans, toasted (and divided)
For The Icing:
1 8 oz. brick of cream cheese (at room temperature)
1/2 cup butter (at room temperature)
2 tsp. vanilla
3-4 cups powdered sugar
Yield: 2-8" or 9" layers (or, like I made, 3-6" layers)
* First, let me give you the head's up that this is not a quick recipe. Plan at least 30 minutes to an hour to make the batter before you even get the cake to the oven.

When the edges start to turn golden brown, remove the pan from the oven. Gently shake the pan for about 30 seconds to finish toasting. Remove from the pan to a cutting board.
Then, toast the pecans, by spreading them on the same sheet, and baking for about 5-7 minutes at 350.
I would do the nuts and coconut separately, because while they each take about 5-7 minutes to toast, the coconut is much more delicate, so once it starts to get golden, it needs to come out immediately, or it will burn.


Add eggs, one at a time, mixing well with each addition, and scraping down the bowl in between.

 , or just dip a paper towel in shortening, and rub it along the sides.
*Note: I recommend using Bake Even Strips when you bake. I didn't this time because I thought the cake would be dense enough that it wouldn't dome much. I was wrong. I should know better. Click the link to see my post on Bake Even Strips, see what they do, and how you use them.

Bake in a 350-degree oven. I baked the 6" cakes for 25-30 minutes. I would expect 8" cakes to take about the same, and I'd check 9" cakes around 20 minutes.

While the cakes cool, you can make your icing.
Cream together the cream cheese and butter in a mixing bowl. Add the vanilla, mix well. Add the powdered sugar about 1 cup at a time, until it reaches the desired thickness. (If it gets a little too thick add a tsp. or so of milk to thin it down.)
I don't know how it's possible that I have zero photos on this entire site of making cream cheese icing, but somehow, I do not.
Decorating The Cake:


!Remember! You always decorate cakes upside down... so the bottom is the top and the top is the bottom. If you're doing two cakes together, put the bottom layer right side up, and the top layer upside down on top of it. (Click here to see the how to ice a cake tutorial.)

You may also notice that I've got this on a piece of parchment paper to cover the sides. It was easier for me to pick up the cake (to roll the sides) when it was on the parchment paper. That way, I could get my hand underneath it, and not be completely covered with icing.


I can't show you this in photos, because I needed both hands for the cake. So, this is the picture I could get. I highly do NOT recommend letting it go and setting it on its side as you see here. Keep your hands on it!! I consider myself very lucky that this photo- and cake- worked out.

*Note: You wait to ice the top of the cake because you have to hold it by the top and bottom. If you're holding an iced cake, I don't think it would end well.

Click the link if you want to see my complete tutorial on How to Ice a Cake.

I made the carrot border using a Tip #5
for the carrots and a Star Tip #14 for the leaves.I tried to take a photo of the technique, but it just didn't want to work for me. To make the carrots, hold the piping bag so that the back of the bag is towards your chest. Squeeze to make the fat end of the carrot, and slowly move towards yourself while you squeeze more gently.
If you've made a shell border before, the technique is similar to that. You would use the same technique with a little less pressure for the green on top.

Variations:
If you want to make this cake with a little less "texture," I recommend leaving the nuts and coconut out of the batter - but still add them to the sides.
You can also substitute all applesauce for the crushed pineapple, thereby removing that bit of extra texture as well.
If you use the smaller side of the grater for the carrots, I didn't notice that they actually added much texture at all to the cake.
Click the Links Below to See:
My Pumpkin Cake Recipe
How to Ice a Cake Tutorial
What Does That Do?! Bake Even Strips
And don't forget, if you shop at Amazon.com through my link
, you support this blog and its contents. Thank you!


